WHAT DOES LIGHT BULB COLOR TEMPERATURE MEAN?

What does light bulb color temperature mean? That is a great question. My day job has me wearing to different hats as far as job responsibilities are concerned. My primary job is Director of Information Technology but I am also head of facility maintenance and have been for nearly 30 years. In that time frame I have become somewhat of a lighting snob. This also means I am very sensitive to the color temperature of lighting. Just like at the day job I like my home lighting a certain way and color temperature, color rendering index (CRI) and lumens are the key.

What does light bulb color temperature mean? It means confusion for consumers.

In an office or Industrial environment attention is always or should always be paid to light bulb color temperature. Now home owners and consumers are being forced to do the same.

In the old days of incandescent lighting you would simply buy a light bulb based on wattage and the choice of warm white, cool white or daylight. Buyers without much thought would simply match and buy the same bulb style they were replacing. None of this color temperature nonsense. Now in the days of LED bulbs buyers are faced with options of color temperature, lumens, CRI and wattage equivalent.  I hear people in Home Depot and Lowes comment “Buying light bulbs shouldn’t be this hard”. Online Q&A’s share the same sentiments. Consumers looking to replace incandescent lights with LED’s should not worry about CRI or even lumens. Your local Home Depot and Lowes wont have enough choices for these details to be a concern in bulb selection.

What does light bulb color temperature mean?

QuestionWhat does light bulb color temperature mean?

AnswerSimply put the color of the light you see when you turn on a light bulb. Color temperature is displayed as a number like 2700k which really means 2700 Kelvin. Kelvin is the measurement system used to measure the color temperature of light. All light bulb types and technologies use the same Kelvin system. Incandescent (Tungsten), CFL, Fluorescent, High Pressure Sodium, Metal Halide and of course LED.

What does light bulb color temperature mean?

Light Bulb Color Temperature Comparison Chart

Light Bulb Color Temperatures

2700K-3000K – Warm White – 2700K is the warm yellow light most think of when thinking of a normal light bulb. It’s the light humans have been seeing for millions of years in fire and candle light. 2700K is great all around the house except in the kitchen or task reading light. Use 2700K for a warm cozy light. 3000K is slightly whiter. In LED’s I often find I prefer 3000K.

3500K-4100K – Cool White – Cool white is neutral and great in the kitchen, bedroom and to read by. It’s typically used in offices,reception areas where you want a clean bright white that is still warm and inviting. I suggest 3500K unless you want more white

5000K-6500K – Daylight – Daylight has a blue tint. The higher the temperature the more blue the light. Daylight bulbs are what you often see in grocery stores, hospitals, galleries, museums. It’s a good choice where women are applying make-up and doing their hair.

LED Light Bulb Recommendations

Im often asked what led light bulbs to I use and where do I use them. I hope you find the information useful. Note: I buy nearly all my LED’s online so I can get exactly what I want. Below will be the links to the LED’s I currently use.


HALF BED SHEETS | SPLIT THE SHEETS

HALF BED SHEETS | SPLIT THE SHEETS

BED TOO HOT, BED TOO COLD, BED JUST RIGHT

I have found one of the biggest difficulties sharing a bed with someone is maintaining a comfortable body temperature. My girl likes the bedroom to be a freezer and the sheets to be the coldest cotton known to mankind. She leaves the window open all winter. Me on the other hand, I like my bed to be toasty warm.  We do not seem to be able to find a compromise. Then today I had this amazing idea for an invention “Half Bed Sheets”. I envisioned crisp and cold on one side of the bed for her and fleece on the other side for me. Unfortunately my dreams of a million dollar must have invention were dashed by an amazon product page for “Split the Sheets“.

It’s important to note that the “Split the sheets” are not for adjustable split beds.

SPLIT the SHEETS | HALF BED SHEETS

It never fails – when a couple goes to bed, one person wants to get into a cool bed and one wants to get into a warm bed. I have experienced this same dilemma over the past 30 years of marriage. My lovely wife always wanted fuzzy flannel sheets because she was cold. I always wanted cool cotton sheets because I was hot. Well, I thought I would do something about it! Lying in a puddle of sweat one night, I came up with an idea. What if there was a sheet with a seam down the center attaching cotton together with polar fleece? Yes! I thought. Finally, we could both be comfortable. Thus, Split the Sheets was born!

If you are looking for a cooler nights sleep and your partner is always chilly and wanting a fleece sheet to sleep in…you can not always split the bed but you can Split the Sheets. Finally a cool cotton sheet for one half of the bed is combined with the cozy warmth of micro fleece on the other half. The pillowcases are fleece on one side and cool 200 thread-count cotton on the flip side. This finally makes sleeping a breeze. Just flip the pillowcase over to receive the comfort you want at any time.

Split the Sheets are designed so that they can be rotated, turned or flip-flopped end-to-end. This way, it doesn’t matter which person wants the warm fleece and which one wants the cool cotton, you can both be comfortable. Both the flat and fitted sheets have a seam running down the middle so that one partner can sleep warm and the other cool. In addition, Split the Sheets have deep 18-inch pockets built into the fitted sheets so they will not detach from even thicker sized mattresses or mattresses with extra cushions. Queen flat sheet 90 x 102, fitted 60 x 80 x 18, 2 pillowcases 20 x 32. King flat sheet 108 x 102, King fitted sheet 78 x 80 x 18 deep, 2 King pillowcases measure 20 x 40 each. The King set will also fit California King beds. These sheets are not for adjustable beds.

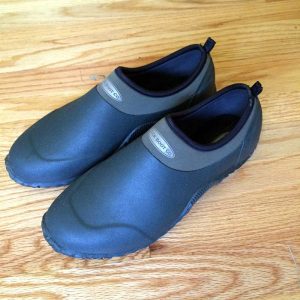
Dog Walking Shoes | MuckBoots | Unisex | Edgewater Camp Shoe

Dog Walking Shoes - MuckBoots Unisex Edgewater Camp Shoe

MuckBoots – Unisex, Edgewater Camp Shoe

Dog Walking Shoes

Sully

Sully

Dog Walking Shoes – So we recently added a new member to our household, that new member is a German Shepherd puppy we named “Sully” after Paul Newman’s character in the wonderful movie “Nobody’s Fool”. Sully is the first puppy for me since my teens o there’s going to be a lot of puppy dog entries on the site.

Having to take Sully out constantly while potty training lead me to my first annoyance/issue. I hate wet feet. Going outside in the evenings, mornings and rain into the lawn had me constantly dealing with wet shoes, wet socks or wet slippers. That had me thinking I’m not the only person annoyed by this so I set out to find a waterproof shoe I could slip on like slippers. My research lead me to the MuckBoots Unisex Edgewater Camp Shoe as dog walking shoes. The MuckBoots Unisex Edgewater Camp Shoe is typical Muckboots construction and quality.They are easy to slip on,totally waterproof and poop proof. The best  dog walking shoe for me.


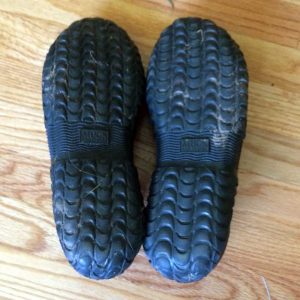
The Original Muck Boot Company™ provides comfortable boots for messy and tough conditions. The Edgewater Camp Shoes have all the standard MUCK BOOT™ features and more to make these the only outdoor shoes you will ever need! A stretch-fit topline binding snugs to the ankles to keep unwanted dirt and pebbles out. The natural rubber upper reinforcement provides added durability while a Trac Trol sole design enhances traction and stability. The full-perimeter wrapped outsole provides maximum protection to toe, arch and heel area.

Dog Walking Shoes - MuckBoots Unisex Edgewater Camp Shoe Soles

MuckBoots Unisex Edgewater Camp Shoe Soles

MuckBoots – Unisex Edgewater Camp Shoe Features

  • Unisex, women’s sizes available
  • Outdoor shoes
  • Stretch-fit topline binding snugs ankles
  • 4mm CR flex-foam bootie with 4-way stretch nylon
  • 100% Waterproof, lightweight and flexible
  • Track Trol sole design for enhanced traction and stability
  • Natural rubber upper reinforcement for added durability
  • Full-perimeter wrapped outsole provides maximum protection to toe, arch and heel area
  • Comfort range of sub-freezing conditions to 85 degrees

Preparing Your TV Samsung | Samsung TV Problem

Samsung Smart TV Menu - Preparing Your TV Samsung

Samsung Smart TV Menu

Preparing Your TV Samsung

The very first page of this site was devoted to the dreaded “Preparing Your Tv” message on my Samsung Smart tv. Despite solving the “Preparing Your TV Samsung” error message I still found the so called “Smart TV” to be a lousy experience. Enough is enough my time is to valuable to waste waiting for a tv. Since writing the original post there has been a few changes around the house. By changes I mean purchasing a Roku 4 and a 65″ LG 4 UHD TV. This means I now have the ability to compare the Samsung Smart TV to the LG Web OS, Roku 4 as well as my trusty Amazon Fire TV. Ill save the actual comparison of those four for another day. For the purpose of this page and your sanity I will simplify and get to the bottom line. Do yourself a favor and forget about using the built in Samsung “Smarts” and buy either an Amazon Fire TV or a ROKU 3 or 4 depending on your needs. Both devices simply just work. I have a personal preference for the Amazon Fire Tv. The unit is small, powerful and the menu structure makes sense especially if you are an Amazon prime customer or like to buy your streaming movies from Amazon. The thing that really seals the deal is the voice search. I love the Amazon Fire TV. On the other hand if your a Netflix junkie the Roku might suit you better as no single app is prominently in your face like the Fire Tv. Both devices simply and elegantly get the job done.

One more compelling reason to go with the 3rd party streaming device is support. TV operating systems quickly become outdated and unsupported by the manufacturer. folks like amazon, Roku and even Apple will provide updates much longer and much more reliably.

STIHL MM55 WONT START WONT STAY RUNNING

STIHL MM55 WONT START WONT STAY RUNNING

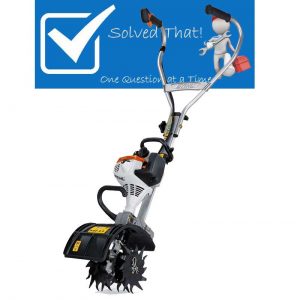
STIHL MM55 CULTIVATOR TILLER

STIHL MM55 WONT START WONT STAY RUNNING


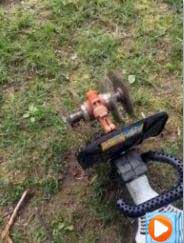
STIHL MM55 WONT START WONT STAY RUNNING – A few years back my trusty old MANTIS TILLER died after many years of faithful service. Being the type of person who likes to try new things I decided to switch brands and go with STIHL. Having experienced several years of flawless operation of  a STIHL FS85 STRING TRIMMER I bought the STIHL MM55 with confidence. The MM55 did not disappoint. It was light, powerful and almost fun to use.

As the season ended I winterized the MM55 same as my other 2 stroke equipment. I poured in some gasoline stabilizer and ran the MM55 out of gas. All was good until the following spring. Come April the following year the MM55 turned from joy to nightmare. It wouldn’t start, the primer bulb would stay down after a few pumps. I knew this meant the carburetor had some sort of blockage. I spent a fair amount of time cleaning the carburetor. Still no luck. I could get the M55 running for a few seconds then it would die. Frustrated I brought it to the dealer I bought it from. Two weeks later I got the MM55 back. Cost $85. Diagnosis, blocked carburetor. Solution replaced carburetor. The dealer politely recommended I try a different fuel stabilizer. I figured what the heck.

Fast forward to season end I winterized again with the added step of compressed air at the carburetor inlet. I thought to myself “ok I got it this time”. Well I was wrong. The next spring was the same as the previous. Back to the dealer same thing, $85 and a new carburetor. Yes I was annoyed.  This time at the end of the season a close friend said he could winterize the MM55 and it would be fine. He is a landscaper and he would winterize the MM55 same as all of his Echo power tools. (BTW Mantis uses Echo engine).

Next spring you guessed it, same results. This time I was determined to not only fix the MM55 myself but understand why this tool was so prone to the issue.

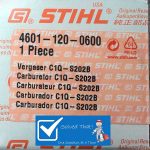
STIHL MM55 CARBURETOR 4601-120-0600

STIHL MM55 CARBURETOR 4601-120-0600

STIHL MM55 CARBURETOR 4601-120-0600 – To understand the problem with the MM55 carburetor  was a simple as taking it apart. Turns out that the STIHL MM55 CARBURETOR 4601-120-0600 is not designed in a way that lends to be able to completely remove unwanted fuel. In fact there are two small chambers at the bottom of the STIHL MM55 CARBURETOR 4601-120-0600 that there is no way to remove the fuel other than to take the carburetor apart. Fortunately I had saved all my previous carburetors and upon disassembling I learned they were all corroded in this area. I did not bother to disassemble further but no doubt there is other nooks and crannies that would exhibit the same problem.


Note from STIHL MM55 Website Product Page

Note:  STIHL recommends use of fuel with no more than 10% Ethanol content. Using fuel with greater than 10% Ethanol content may cause damage to your equipment and may void your STIHL warranty

Why does STIHL say this? Ethanol in todays gasoline is the root of the short shelf life of fuel. This is why your STIHL MM55 Wont Start | Wont Stay Running!!!!!!!

Note: Read page 12 of the STIHL MM55 CULTIVATOR Owner Instruction Manual. The manual is available to download or view further down this page!


Fix Your STIHL MM55 Cultivator

So whats the solution for a STIHL MM55 WONT START WONT STAY RUNNING? The easy repair is the head  to your local STIHL dealer and buy a new STIHL MM55 CARBURETOR 4601-120-0600 for about $40. Dont bother buying online. You will end up waiting and paying more. The STIHL MM55 CARBURETOR 4601-120-0600 is incredible easy to replace.

  1. Remove the screw holding the air cleaner together and put the cover and filter off to the side.
  2. Remove the two fuel lines attached to the STIHL MM55 CARBURETOR 4601-120-0600. They just pop off. (In case you forget upon re-assembly the smooth hose is the upper hose.)
  3. Remove the two nuts holding the STIHL MM55 CARBURETOR 4601-120-0600 in place. Leave the gasket on the bolts
  4. Move the throttle lever enough to remove the throttle cable. Pay attention to the little protective sleeves on the cable. They can slide anywhere on the cable. Their proper orientation is to keep the throttle cable from wearing the plastic disc that that the throttle cable wraps around.

Assemble in reverse order. The first time you do this it will probably take 15 minutes. After that 5 minutes. In fact it probably took me just as long to type the 4 steps as it would to perform. The MM55 will start with the second pull.

STIHL MM55 CULTIVATOR Running After Carburetor Change - Video

STIHL MM55 CULTIVATOR Running After Carburetor Change – Video


Click the Buttons Below to Learn Why Your STIHL MM55 CULTIVATOR Has this Problem

Preventing a STIHL MM55 WONT START WONT STAY RUNNING – OPTION ONE

Now that I know the problem I have modified my winterizing and storage procedure for the STIHL MM55 Cultivator.

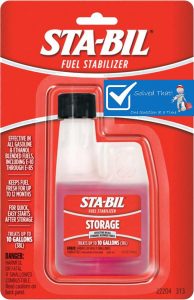
STA-BIL Fuel Stabilizer

STA-BIL Fuel Stabilizer

STA-BIL Fuel Stabilizer – I always include STA-BIL Fuel Stabilizer in my gas. STA-BIL brand Fuel Stabilizer is one of the best products of it’s kind available.

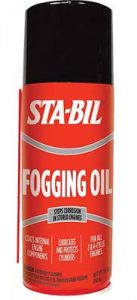
STA-BIL 22001 Fogging Oil

STA-BIL 22001 Fogging Oil

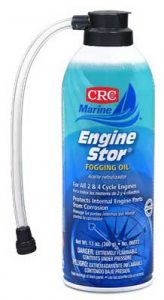
CRC ENGINE STOR | STIHL MM55 Wont Start | Wont Stay Running

CRC ENGINE STOR

Beyond the fuel stabilizer the STIHL MM55 needs one more step. The carburetor needs to have something displace any fuel left in the carburetor and it also needs something to protect and lubricate the internal surfaces. I have decided to treat the MM55 the same as the Mercury outboard of my Ranger Bass Boat which successfully started for 20 plus fishing seasons. I use CRC ENGINE STOR or STA-BIL 22001 Fogging Oil.

After running the STIHL MM55 out of fuel and with the engine off hold the throttle wide open (full throttle) and spray the Engine Stor/Fogging oil in the carburetor and pull the starter rope couple times. This will lubricate the engine cylinder. You can also optionally remove the spark plug and directly spray the Engine Stor/Fogging oil into the cylinder. The next step requires an air compressor. Disconnect both fuel lines from the carburetor and used compressed air to blow the gas out of the engine. I like to hold a paper towel or rag over the carburetor to catch the fuel that blows out of. Be sure to operate the throttle to it’s full open position. Once no more fuel blows from the carburetor fill both ports with the Engine Stor/Fogging oil. Again actuating the throttle. The goal here is to fill the carburetor with the Engine Stor/Fogging oil. Use compressed air on both carburetor ports where the hose was attached. Once complete replace the bottom carburetor hose and one last time fill the top port with Engine Stor/Fogging oil and replace the hose. Place the carburetor in choke mode and with the engine turned off pull the starter rope a few times. You can also press the primer bulb a few times. All this should have saturated the carburetor and engine internals with the Engine Stor/Fogging oil make spring start up a breeze.

Keep in mind upon startup it will take a few pulls to get gas into the system and the MM55 will blow some smoke as the Engine Stor/Fogging oil burn up. also keep in mind that some of the Engine Stor/Fogging oil might leak from the exhaust muffler. Consider that fact during storage.

Solved That!